


Table of Contents
Some links on posts are affiliate links and will earn us a commission from qualifying purchases
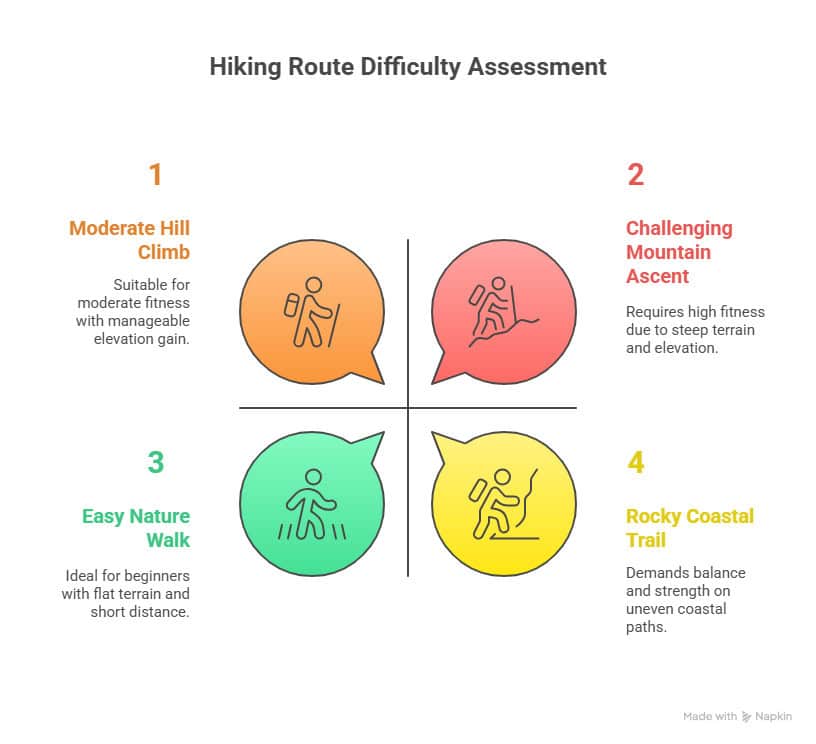
Choosing the best hiking route depends on knowing your fitness level and what you can handle safely. Matching the difficulty of the trail to your current fitness helps you enjoy the hike without risking injury or exhaustion. It’s important to consider factors like your stamina, strength, and experience before picking a route.
Understanding how steep or long the trail is can help you make a better choice. Trails with fewer elevation changes and shorter distances are better if you’re just starting out or haven’t been active lately. More challenging routes are suitable when you feel stronger and more confident. Planning with your own abilities in mind makes your hiking experience more enjoyable and successful.
You also need to prepare properly and know what gear to take. Using good maps or apps can guide you and keep you safe on unfamiliar trails. With the right plan, you can improve your fitness over time and take on more demanding hikes when you are ready.
Key Takeways
- Choose hikes that fit your current fitness and experience.
- Consider distance, elevation gain, and trail difficulty levels before deciding.
- Prepare well with the right gear and navigation tools.
Understanding Your Fitness Level
Knowing your current fitness helps you pick a hiking route that matches what you can handle. You should consider your strength, endurance, goals, and any health issues to avoid injury or frustration.
Assessing Physical Condition
Start by reviewing your current physical activity. Think about how often you exercise, the types of activities you enjoy, and how long you can stay active without feeling too tired. If you don’t do much exercise, choose easier trails with less distance and elevation gain.
You can also perform simple fitness tests like walking a set distance or climbing stairs to check your endurance and leg strength. If you find these challenging, avoid steep or long routes until you improve your fitness.
Tracking your heart rate during exercise can show how hard your body is working. A high heart rate might signal that a route is too tough for you right now.
Identifying Personal Goals
Define what you want from your hike. Are you aiming to improve fitness, enjoy nature, or build strength? Your goals will shape which trails fit best.
If your goal is fitness, pick routes with gradual elevation gain and moderate distance to build stamina. For relaxation and scenery, easier paths with flat terrain are better.
Set realistic goals based on your current fitness. For example:
- Goal: Build endurance
Trail choice: Medium distance with some hills - Goal: Enjoy nature slowly
Trail choice: Short, flat walk
Clear goals help you stay motivated and track your progress on the trail.
Recognising Limitations and Risks
Be honest about any health conditions like asthma, joint pain, or heart issues. These can limit your endurance and increase risk on difficult trails.
Consider risks like weather, trail length, and elevation gain. Steeper routes require more strength and have higher injury chances if your fitness is low.
Use a checklist before hiking:
- Do you have any pain or discomfort?
- Are you prepared for sudden weather changes?
- Have you done similar hikes before?
If you have doubts, start with easy trails and consult a doctor or fitness expert before attempting harder routes. This helps you avoid injuries and enjoy hiking safely.
Knowing your limits is as important as knowing your strengths when picking the right hiking trails.
For more on fitness tests for hikers, see fitness assessments for hikers.
Key Factors in Choosing Hiking Routes
When picking a hiking route, focus on how challenging the terrain is, the length and height you will cover, and how weather or seasons might affect your hike.
Evaluating Terrain Difficulties
Look closely at the type of ground you’ll be walking on. Rocky, uneven, or steep paths require better balance and strength. Flat, smooth trails are easier to manage if you are a beginner or want a relaxed walk.
You should check if the route includes obstacles like loose stones, roots, or water crossings. These make the hike harder and slower. Also, consider if the trail is well marked or if it demands good navigation skills.
Tip: Choose terrain that fits your current fitness and experience. If unsure, try easier trails first and build up.
Distance Versus Elevation Gain
Distance means how far you will walk. Elevation gain is the total amount of climbing you will do uphill. Both affect how tiring a hike will be.
For example, a 5-kilometre flat walk can be much easier than 3 kilometres with steep climbs. If your fitness is moderate, start with shorter routes and less elevation. As you get stronger, increase distance or height step by step.
A gain of 300-500 metres in one day is moderate for many walkers. Anything above 600 metres is quite challenging, especially if done over a short distance. This affects how tiring a hike will be.
Use trail descriptions to check elevation gain. A higher gain usually means more effort is needed. You can find this info on sites like How to choose a hiking trail.
Weather and Seasonal Influences
Weather changes can make the same trail feel very different. Rain makes paths slippery and can increase risk of injury. Snow or ice requires special gear and skills.
Check the forecast before you set off. Some seasons also bring pests like ticks or have more daylight, which affects timing. Summer hikes need sun protection and water, while autumn and spring may have cooler temps but wet ground.
Plan your hike around the weather and season to stay safe and comfortable. Always have basic gear for unexpected changes.
Matching Hiking Trails to Ability
Selecting a trail suited to your current fitness level ensures a safer, more enjoyable hike. Pay close attention to factors like trail length, elevation, and terrain type. Preparing for these details reduces physical strain and prevents injury.
Beginner Trail Recommendations
If you are new to hiking, select trails under 5 kilometres with mostly flat or gently rolling terrain. Look for well-marked paths without steep climbs or rough surfaces. These routes will let you build stamina without excessive strain.
Focus on trails with even footing and clear signs. Avoid rocky or slippery sections that require advanced balance or agility. A good beginner trail often has resting points and open spaces to pause comfortably.
Before starting, check the expected time to complete the hike. Choose hikes that take no more than 2 hours at a steady pace. This helps you manage your energy and gain confidence on your feet.
Intermediate Route Suggestions
Once you’ve mastered easier trails, try routes between 5 and 12 kilometres with moderate elevation gains. You should be able to handle uphill sections with some uneven ground or loose stones.
Look for trails rated as moderate difficulty level by official systems. These paths challenge your endurance and leg strength without needing technical climbing skills.
Prepare for longer hiking times, usually between 3 and 5 hours. Carry essential gear like extra water and snacks, and plan for short breaks on steeper climbs.
If a trail includes switchbacks or requires navigating narrow ridges, ensure you have basic route-finding skills and steady footing before setting out. For guidance, review a trail difficulty rating guide.
Advanced Route Planning
When you plan more difficult hikes, you need to think carefully about your stamina and skills. Longer trips require good pacing, proper gear, and understanding tricky terrain. Preparing for these challenges helps keep you safe and confident on the trail.
Multi-Day Hikes for Experienced Walkers
For multi-day hikes, start by choosing routes that match your fitness level and experience. You should test yourself with shorter trips before moving on to week-long hikes. Plan your daily distances based on how many miles you can comfortably walk day after day.
Carry essential gear like a tent, sleeping bag, and enough food to last multiple days. Make sure you know where water sources are along your route. It’s important to have a detailed itinerary and let someone know your plan.
Rest well each night and monitor your body for signs of fatigue or injury. Multi-day hikes demand steady pacing and good endurance, so build up gradually if you are new to this. More tips on preparing for longer trips are available at how to plan a multi-day hiking trip.
Technical Demands and Skills Required
As the difficulty of routes increases, you may face steep ascents, rocky paths, or river crossings. You need strong navigation skills, including map reading and using a compass or GPS. Practice these before tackling technical trails.
You might also need to use hands for scrambling or know basic rope work in some areas. Proper footwear with good grip is essential to prevent slips. Weather can affect trail safety, so learn to read conditions and adjust plans as needed.
Assess the trail’s challenge level honestly. If the route demands skills or equipment you don’t have, it’s better to choose something easier. Building your abilities safely over time will help you enjoy more advanced hikes without unnecessary risks. For a helpful guide on planning difficult hikes, see Level Up Your Hiking.
Essential Gear and Preparation
To hike safely and comfortably, you need the right footwear, clothing, and safety gear. Your choices should protect you from weather, terrain, and potential hazards. Proper preparation helps prevent injuries and improves your overall experience.
Choosing Proper Footwear and Clothing
Your feet need support and protection. Choose hiking boots or shoes with good grip, ankle support, and waterproof features if you expect wet conditions. Make sure they fit well and are broken in before the hike to avoid blisters.
Dress in layers that you can add or remove as the weather changes. Start with moisture-wicking base layers to keep sweat off your skin. Then add insulating layers like fleece for warmth. Finally, carry a waterproof, windproof outer layer to protect you from rain and wind.
Avoid cotton clothing because it holds moisture and cools you down. Instead, pick synthetic or wool fabrics. Wear a hat for sun protection and carry gloves if it might get cold.
Packing Safety Equipment
Carry basic safety items even on easy hikes. These include a map, compass or GPS device, and a fully charged mobile phone. A first aid kit is essential; include plasters, antiseptic wipes, painkillers, and blister treatment.
Pack enough water and snacks to keep your energy up. Energy bars, nuts, and fruit work well for this.
Other useful items are a headlamp or torch, whistle for signaling, and emergency blanket. These can be critical if your hike takes longer than planned or if the weather turns.
For a full guide on what to bring and prepare, see this guide to hiking safety and essential gear.
Navigation and Trail Resources
Knowing how to find your way and where to get reliable information can make your hike safer and more enjoyable. You will rely on physical or digital maps and local destination guides to stay on the right path.
Using Maps and GPS Devices
Paper maps show detailed trail routes, landmarks, and elevation. You should carry a waterproof map and know how to read contour lines and symbols. Always have a compass as a backup, even if you use a GPS device.
GPS devices and smartphone apps can track your location in real time. Apps like AllTrails or Komoot offer maps, trail difficulty levels, and user reviews. Make sure your device is fully charged and download maps offline in case of poor signal.
Tips for using GPS:
- Check the battery level before your hike
- Carry a power bank for longer trips
- Familiarise yourself with the device controls before starting
- Don’t rely solely on GPS; combine it with a physical map
Accessing Local Trail Guides
Local trail guides provide specific information about routes, conditions, and points of interest. You can find guides at visitor centres, national parks, or local outdoor shops.
Many websites offer free or paid trail guides that include maps, photos, and trail descriptions. These often highlight the trail’s difficulty and any hazards you should watch for.
Where to find reliable local guides:
| Source | What They Offer | How to Access |
|---|---|---|
| Visitor Centres | Printed maps, expert advice | In person |
| Outdoor Shops | Guidebooks, equipment tips | In person or online |
| Trail Websites | Route details, weather updates | Online, downloadable files |
| Community Forums | User experiences, trail alerts | Online, social platforms |
Using these resources helps you pick a route that matches your fitness and ensures you are prepared for the terrain.
Improving Fitness for Challenging Hikes
To tackle tougher hiking routes, you need to focus on exercises that build strength and stamina. A clear plan will help you improve safely and steadily, reducing the risk of injury.
Training Techniques
Start with exercises that target your legs, core, and cardiovascular system. Squats, lunges, and step-ups increase leg strength, which you’ll need for uphill climbs. Include planks and bridges to improve core stability, helping you balance on rough trails.
Add cardio like brisk walking, cycling, or jogging. Aim for at least 30 minutes, three times a week, to boost your heart and lung capacity.
Using a weighted backpack in training helps your body adjust to carrying extra weight. Increase the load gradually to avoid strain.
Remember, warming up and stretching before and after your workouts lowers injury risks and keeps your muscles flexible.
Building Endurance Over Time
Endurance improves gradually with consistent effort over weeks or months. Make a training schedule that slowly increases your walk or hike distance by about 10% each week.
Mix flat terrain with hills to simulate real trail conditions. This challenges your muscles and teaches your body to manage different surfaces.
Rest days are important. They allow your muscles to recover and grow stronger.
Track your progress so you can see improvements in distance, speed, and how you feel after workouts. This helps you stay motivated and adjust your plan when needed.
For more detailed guidance, see how you can create a training schedule for mountain hiking.
Safety Considerations on the Trail
Before you start your hike, check the trail conditions. Look at the terrain, weather forecast, and any recent reviews to know what to expect. This helps you avoid surprises and stay prepared.
Always tell someone your hiking plan. Share your route and expected return time. This is important in case you need help or get lost.
Pay attention to your body. If you feel tired or unwell, stop or turn back. Pushing yourself too hard can lead to injury or worse.
Be aware of your surroundings. Stick to marked trails and watch for hazards such as loose rocks or slippery surfaces. This lowers your risk of accidents.
Consider the group size and skills. Hiking alone needs extra caution. If you’re with others, stay together and support one another.
Here is a simple checklist for safety:
| Safety Item | Why It’s Important |
|---|---|
| Water | Prevents dehydration |
| Map and compass | Helps with navigation |
| Weather-appropriate clothing | Keeps you warm or dry |
| First aid kit | Treats minor injuries |
| Communication device | For emergencies or lost situations |
Planning your route with these safety tips in mind helps you have a secure hike that matches your fitness level. For more detailed advice, see this outdoor safety guide.
Responsible Hiking and Environmental Awareness
When choosing a hiking route, it’s important to think about how your trip affects nature. You can enjoy your hike while protecting the environment around you.
Always stick to marked trails. This prevents damage to plants and reduces soil erosion. Straying off the path can harm fragile habitats and disturb wildlife.
Bring all your rubbish home with you. Leaving litter behind can pollute the environment and hurt animals. Use reusable containers to reduce waste.
Respect wildlife by observing from a distance. Do not feed or approach animals, as this can change their natural behaviour and make them dependent on humans.
Follow the Leave No Trace principles, which are simple guidelines to minimise your impact. These include:
- Planning ahead and preparing
- Travelling and camping on durable surfaces
- Disposing of waste properly
- Leaving what you find
- Minimising campfire impacts
- Respecting other visitors and wildlife
Being mindful of your fitness level helps reduce your need for assistance, which can strain rescue resources in natural areas. Choosing a suitable route also means you can focus more on enjoying the environment safely.
For tips on how to pick trails that match your fitness, see how to choose hiking trails for your fitness level.
Frequently Asked Questions
You need to evaluate your strength, stamina, and how much elevation you can handle before picking a hike. Knowing typical distances and how difficulty grades work will help you choose routes that match your fitness. Preparing properly can improve your ability to hike longer and tougher trails safely.
How should I assess my current fitness level for hiking?
Be honest about your stamina and endurance. Think about how long you can walk on uneven ground without getting very tired or sore.
Consider how comfortable you feel climbing hills or carrying a backpack. This gives a clear idea of what kind of trails suit you. For more guidance, check consider your stamina and endurance.
What average distance should I aim for when hiking daily?
Most beginners start with 5 to 8 kilometres per day on easy terrain. If you are fitter, 10 to 15 kilometres a day is common for moderate hikes.
Your target will depend on your speed and how many breaks you take. Adjust distance based on how you feel after each hike.
Can you explain the various grades on a hiking difficulty scale?
Trails are often graded as easy, moderate, or hard. Easy trails are flat with smooth paths.
Moderate trails include some hills and rougher terrain. Hard hikes may involve steep climbs or uneven ground for longer periods.
Knowing these grades helps you pick safe and suitable routes.
What essential factors should be considered before selecting a hiking trail?
Look at choosing the right trail length, elevation gain, and the terrain type. Also, assess your personal fitness and weather conditions.
Check if the trail has clear markings and access to water or rest spots. This ensures a safer and more enjoyable experience.
Conclusion
Choosing the right hiking trail isn’t just about picking a pretty destination – it’s about matching the route to your current fitness, goals, and experience. By honestly assessing your physical condition, preparing with the right gear, and understanding the demands of the trail, you can avoid common risks and focus on enjoying your hike.
Whether you’re just starting out or building towards more advanced routes, taking a thoughtful, gradual approach will keep you safe, motivated, and better prepared for future adventures.
With the right mindset and preparation, every hike becomes an opportunity to improve your health, connect with nature, and grow in confidence on the trail.
Recent Posts
Best Walking Techniques for Long Distances Optimised for Endurance and Comfort
Walking long distances takes more than just putting one foot in front of the other. The best walking techniques focus on maintaining good posture, using an efficient stride, and pacing yourself to...
Hiking is a gateway to breathtaking views, tranquil moments, and a profound connection with nature. But even the most picturesque trail can become a challenge without the right gear. Imagine a long...