

Table of Contents
Some links on posts are affiliate links and will earn us a commission from qualifying purchases
Whilst out walking we explore lots of new places, and of course, we have our favourite everyday walks too. When finding somewhere new to walk, it’s always great to take photos of some of the fantastic views that we come across, and maybe the little quirky things or wildlife that we encounter.
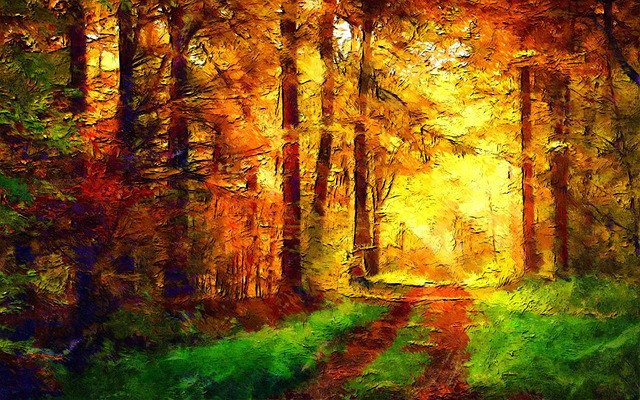
On our favourite walks that we do day in, day out, those closest to us, it is surprising how much the scenery changes over the seasons, and it’s nice to record the little things – the spring flowers and blossom on trees, leaves creating a blanket of shade from the full summer sun, those same leaves changing colour and dare I say, snow blanketing the paths and trails.
Most of the time we use our mobile phones to record these wonderful things, but obviously some people prefer to use an actual camera, and so we did some research and thought we’d share what we found with you.
Choosing what camera and accessories to take whilst walking or hiking
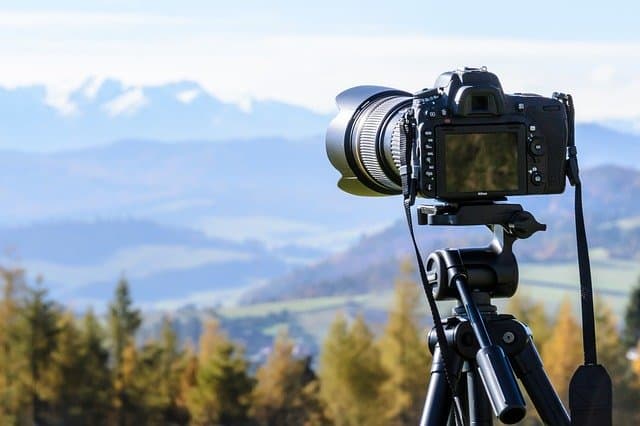
When it comes to choosing what camera, especially if you are buying a new camera with the main purpose of taking photos whilst out walking, then it is important to consider the fact that you have to carry it. You don’t want to be lugging around some huge camera because after a few miles that is going to be a strain.
You’ll also want to only take the bare essentials when it comes to accessories, just enough that will give you the best chance to take some awesome photos without the weight putting unnecessary strain on your body.
So what are the essential camera accessories that you need to be carrying whilst walking to take great photos?
- Your camera – choose a compact, lightweight camera
- Appropriate lens(es) to enable you to capture great shots
- Extra battery or battery charger – particularly if it’s cold as battery life will disappear in the cold
- Lens cleaning cloth
- Waterproof carrying bag – if there’s a chance of rain you don’t want water coming in to destroy your camera
- A lightweight/compact tripod (optional) – to ensure no camera shake at the crucial moment, particularly good if you are hoping to get wildlife photos.
What type of camera should I take on long walks?
There are 3 types of camera that you may want to take with you, as follows:
DSLR – “digital single-lens reflex camera”
This is the most advanced and professional camera that you could choose. If you are looking for truly professional photographs this is the one you are most likely to choose.
Click the button above to see the latest best sellers on Amazon.
Mirrorless camera
A camera that doesn’t feature a mirror box — a key component of a DSLR camera. Instead of an optical viewfinder, the imaging sensor is exposed to light at all times — giving you a preview of your image on a rear LCD screen or electronic viewfinder.
Click the button above to see the latest best sellers on Amazon.
Point-and-Shoot
A shoot and point camera is compact and lightweight and is designed to be easy to use. The perfect choice when beginning, especially if you are not sure if you will continue your interest in photography, and also great to spark children’s interest.
Click the button above to see the latest best sellers on Amazon.
Battery Life Tips
Battery life is really important – you don’t want to walk several miles to the top of a hill to capture a particular landscape, only to find your battery has died. Obviously remembering to fully charge your battery before you head out is essential, but here are some things that may help prolong your battery life:
- In sunny weather, carry a solar-powered battery charger
- In overcast weather, carry a portable battery charger
- Turn the flash off – not required when outside
- Dim the LCD display – check the settings before you head out
- Keep your camera as warm as possible — cold temperatures suck battery life
- Turn off auto focus assist and auto review, if applicable. (Don’t be tempted to review your photos while you’re hiking – wait until you get home)
- Don’t use the video option
Basic Photography Terms
I’ve always been confused when it comes to photography, as there are lots of terms that aren’t easily guessable on their meanings. So I thought it best to look them up and help explain in hopefully an easy way for you, in case you glaze over like me.
These terms are only used with DSLR and mirrorless cameras – not point to shoot cameras which basically does what it says on the tin. You can adjust all of these on the most sophisticated cameras, which is why before it’s been hard for me to visualise. I guess it’s a case of get a camera and try – like most things in life, unless you immerse yourself and give things a go, you won;t fully understand.
Of course with all of these it would be best to check the manual for your particular camera to know how to change these settings. Why not read up first on one setting, then head out into the garden or nearby park to adjust the settings, take some photos, and see the results. Then take on the next setting and repeat, until you feel confident enough to take out on a hike.
Exposure: In order to look it’s best, your photo needs to be ideally exposed. You don’t want your photos too look too dark or too light. To get this you need to adjust your three exposure settings (ISO, aperture and shutter speed). Your camera’s light meter will read “0” when correctly exposed — +1 is too bright and -1 is too dark.
ISO: The ISO measures the light sensitivity of the camera. A higher ISO means your image sensor is more sensitive to light, and is used for night-time shots or maybe an indoor sports event where players are moving quickly. A lower ISO is the opposite, less sensitive to light.
In general, when out walking, stick with a low ISO setting to avoid graininess. If it’s a sunny day set your ISO to about 100. For a really overcast day, you could go up to 400.
Your camera well may allow you to set it as Auto Mode, and as such the camera will select the setting automatically for the scene you are setting, although it will try to keep as low as possible.
Aperture (f-stop): A simple description of aperture is the amount of light that comes through the lens when taking a photo. A larger opening will allow more light through the lens; a smaller opening, less light.
Aperture is measured in the term f-stops. The lower the f-stop, the larger the lens opening. The higher the f-stop, the smaller the lens opening. (To me this is one of the confusions – in my mind it should be the other way round, but then I am a beginner.)
The most important use of changing the aperture is the depth of field that you wish to capture. With more light (lower f-stop) you’ll get a shallower depth of field and only part of the photo will be in focus. With less light (higher f-stop) you’ll get a wider depth of field and more of your photo will be in focus.
So for landscapes you want to use a low light aperture (high f-stop); for close ups of flowers (for example) use a high light aperture (low f-stop). Any clearer?
Shutter Speed: Shutter speed is the amount of time that the shutter is open, and is measured in fractions of seconds. A bigger denominator is faster than a lower one – 1/1000 is much quicker than 1/30.
The longer a shutter is open, the more light it admits. A lower shutter speed setting lets in more light and blurs motion whereas a higher shutter speed setting lets in less light and thus freezes motion.
If you are using a lower shutter speed you may well need to use a tripod to alleviate the problem of camera shake whilst taking photos, otherwise you stand a good chance of ending up with a blurred end photograph.
So what do you want to use when walking? If you are taking a close up of a bird that is flapping it’s wings – a very high speed like 1/1000 shutter speed. But if you are taking a waterfall or river where you want to capture a feeling of movement you may want a shutter speed of 1/3 – but don’t forget your tripod!
Outdoor Photography Accessories
We touched briefly on the kind of accessories that you may find essential, but let’s look at these in more detail.
Lenses: If you are looking to take photos of landscapes, then an essential tool will be a wide angle landscape lens. Most landscape lenses will provide an angle of between 114-122 degrees.
Alternatively, you may be looking for extra zoom capabilities, and you can get zoom lenses that will enable you to zoom into a variety of lengths, as opposed to a prime lens that will be of one fixed length (although they can vary anywhere between 12mm and 5200mm).
If you are shooting wildlife photos you will want to be able to zoom in from quite some distance away, so as to not scare the subject of your photo. You’ll need at least a 200mm lens for shooting wildlife – you need to respect the animal’s privacy. This will also compress the background so that your animal will stand out.
Check out the best sellers on Amazon here.
Camera Bag: You want to keep your camera and equipment protected from the elements – a camera that gets exposed to hard rain is not going to perform well, if at all! So a camera bag is pretty essential.
Think about size – if you are likely to take lots of equipment such as several lenses, then you may well want a larger bag. But obviously bear in mind that you will still need to carry this bag, so weight and strength are equally important.
If you are looking to do any amount of climbing on rocks then you need to choose a bag with a hard shell to protect it’s contents.
Tripod: A tripod may not be high on everyone’s list if they are a casual photographer, and I must admit I rarely see someone hiking with one. But if photography is a big part of your walking experience, then a tripod will be an invaluable tool.
As we have seen in the settings above, if you are looking to take images of moving objects such as wildlife or flowing water, then you’ll need a tripod for sure. Look for compact, lightweight options, so that you don’t increase the burden whilst walking.
Battery charger: As well as fully charging your camera’s battery before setting off, you may want to consider taking a solar powered battery charger if you are going to be out for any length of time. You really don’t want to run out of battery half-way round your walk.
Filters: Camera lens filters are still used today with digital cameras, and can help reduce glare. You can even get UV filters that will help protect the lens from harmful rays. They can protect the lens from dust and scratches. You can also get filters that will help with the colours of your photos, making them pop more.
Seat pad: If you are going to be shooting wildlife in particular you may take ages lining up a shot, often sitting or laying on the grass. A foldable seat pad or mat will keep you dry whilst you get the shot ready.
Ok, so we’ve taken a look at the equipment that will help you take the photos that will remind you of your walks, but what about some actual tips for taking them?
Photography tips
The Manual
Once you’ve chosen your camera, take the time to read the manual. Make sure you familiarise yourself with the different functions and settings, and what each button or switch does.
But don’t try it all at once, otherwise you will become overwhelmed. Choose a scene, then shoot that with different settings. take the time to learn the different options they offer you. Once you have mastered one thing, move onto another the next time you go out.
Light
Light can make a huge difference to a scene. And you can get great results at different times of the day, even from the same vista.
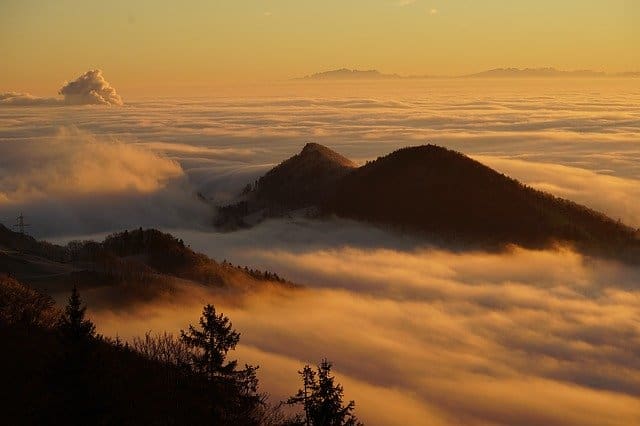
The best light is usually around sunrise and sunset, and if you shoot at these times you can get a huge improvement than if you were shooting photos at say mid-day, for example. And that improvement won’t cost you anything, apart from maybe some sleep!
If you are up early you can expect some great photos of sunrises, with the light rising over the horizon. But don’t rule out the effects that a morning fog can have – especially if you can get high enough up a hill that you are above it.
Try to keep the light behind the camera if possible, unless you are looking for sunrises or sunsets. Don’t under estimate a mid-day shot which can cause some great shadows.
Weather
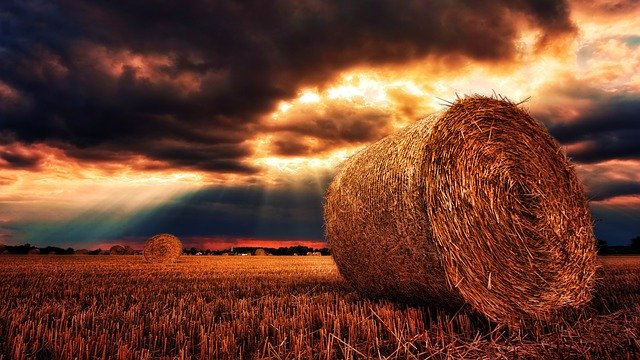
Some of the best photos you see are those with extreme weather. If it’s raining, stormy, misty or even been snowing, you can capture those moments with great effects.
Try to get a good wide angle shot, but think about the amount of sky compared to land or sea that you wish to capture. You can also portray a sense of movement with clouds or maybe trees and grasses being blown in the wind.
Depth
Try and build a sense of depth into your photos. If you are taking a landscape, why not get your partner into the picture. By placing them to one side, you can create a real sense of depth to your photographs. If you are alone is there an interesting feature you could use, such as a tree or trig point?
Brands
If you are an old school photographer who is used to the old days with film, opt for brands such as Fujifilm, Nikon and Olympus. Fujifilm tend to have more designs with dials and buttons – you’ll learn what each one does quicker.
Brands such as Canon, Panasonic and Sony come from a more technical design. Whilst they let the camera do most of the work for you, you won’t the process so well. However if you just want to take photos without learning about the settings, this may be a better route for you.
Round-up
So I hope you enjoy this research we’ve done into the best way to improve your photography. I’m sure like us you like to capture the best version of your walks, whether they are just reminders of walks or maybe you want to turn them into works of art that you can hang in your home?
Recent Posts
The Role of Protein in Walking Endurance: Effects, Needs, and Strategies
If you walk regularly - whether that’s parkrun, brisk fitness walks, or longer weekend hikes - protein plays a key role in how well you recover, adapt, and improve. Walking might not feel as...
The Ultralight Transition: Is It Worth It for UK Day Hikers?
There is a quiet revolution happening on Britain’s footpaths. If you’ve spent any time walking the ridges of the Peak District, tracking the dramatic coastal paths of Cornwall, or winding along...