

Table of Contents
Some links on posts are affiliate links and will earn us a commission from qualifying purchases
Going for a hike is a fantastic way to enjoy nature, but it’s super important to be ready for anything. Knowing some basic first aid and having the right gear can turn a small bump in the road into just that—a small bump—instead of a big problem. Being prepared means you can react quickly and confidently if something unexpected happens far from help.
Getting Ready: Why It Matters
Being prepared isn’t just about reacting to trouble; it’s about avoiding it in the first place. You’ll want to:
- Pack smart: Always carry essential emergency items designed for hiking.
- Know your stuff: Basic first aid skills are a must for handling injuries on the trail.
- Stay connected: Knowing how to signal for help and communicate effectively can make all the difference.
Your Hiking Safety Checklist
Being ready for emergencies means you understand how to stay safe, spot risks, and handle whatever nature throws your way.
Basic Safety First
Your safety is the top priority. Always tell someone your exact route and when you expect to be back. Bring a fully charged phone, but save its battery for emergencies.
Pack essentials like a whistle (three short blasts repeated every minute is a common signal), an emergency blanket to stay warm, and a headlamp with extra batteries. Stick to marked trails to avoid getting lost.
It’s really helpful to learn basic first aid. Knowing how to treat cuts, sprains, or insect bites can help you manage injuries until help arrives. Make sure your first aid kit is well-organized and fully stocked.
Planning Your Adventure
Before you even step on the trail, check the weather and trail conditions. Steer clear of dangerous weather like storms or extreme temperatures. Plan your route carefully and know how tough it will be.
Think about how long you’ll be out and pack enough food and water. Be realistic about your fitness level and choose trails that match your ability.
It’s a good idea to prepare an emergency contact card with important details: your name, age, blood type, allergies, and emergency phone numbers. This can really help first responders.
Understanding Your Environment
Get to know the local plants and wildlife. Some plants can cause allergic reactions or be poisonous. Don’t touch unknown plants or insects.
Understand how animals in the area behave. Keep a safe distance and never feed wildlife. This helps reduce the risk of attacks or illnesses.
Always follow Leave No Trace principles. Carry out all your rubbish and avoid damaging natural features. This keeps the area safe and beautiful for everyone.
Must-Have Emergency Gear
Packing the right emergency items can keep you safe and help you handle unexpected situations. You’ll need supplies for treating injuries, finding your way, and staying protected from changing weather.
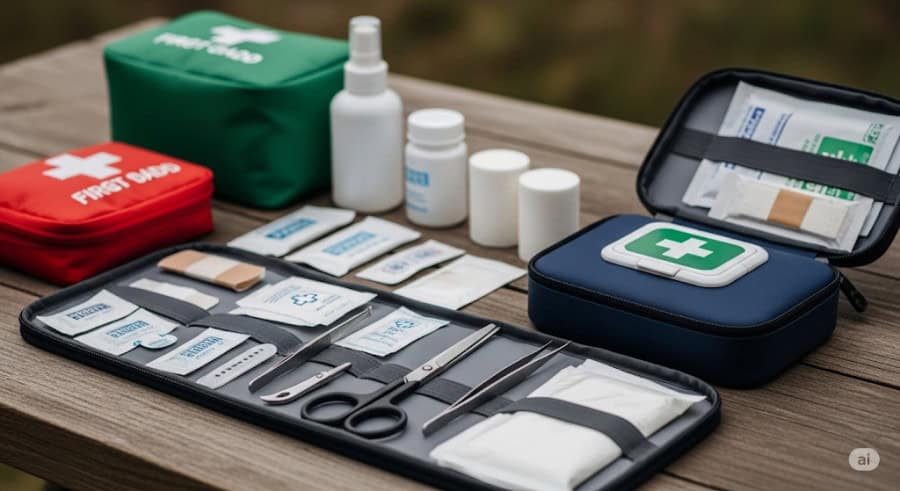
Your First Aid Kit
Your first aid kit should cover common hiking injuries like cuts, blisters, and sprains. Include plasters in different sizes, sterile gauze pads, and medical tape. Blister treatment like moleskin is super important.
Pack antiseptic wipes or solution to clean wounds, along with antibiotic ointment. Pain relief tablets and antihistamines are good for discomfort and allergic reactions. Tweezers are handy for removing splinters or ticks.
Make sure your kit is small enough to carry but has everything you need for your group size and trip length. Check and replace expired items regularly. A detailed list inside your kit can help you stay organized.
Check out this post for our recommendation for a hiking first aid kit!
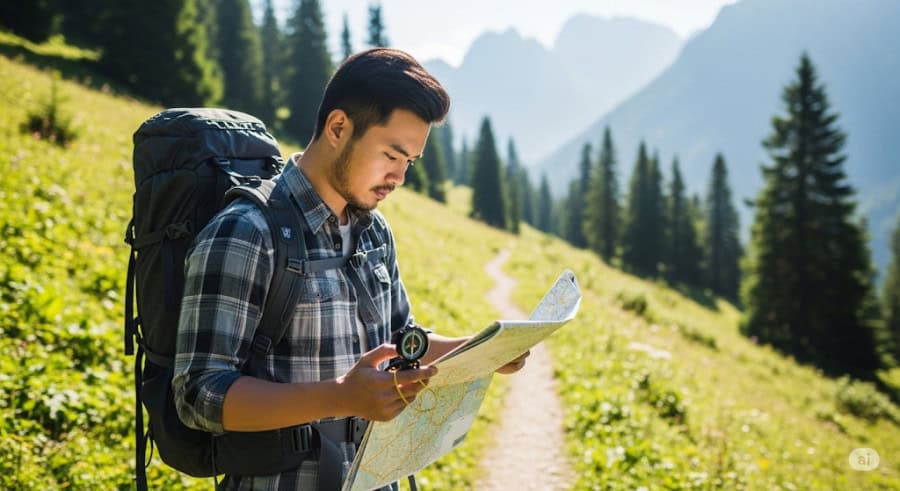
Finding Your Way & Staying Connected
To avoid getting lost, you need reliable navigation tools. A detailed topographic map and a compass are essential, even if you have a GPS device or smartphone. Batteries can die, and electronics can break, so always have a traditional backup.
Learn how to use your compass and read maps before your trip. For communication, carry a fully charged mobile phone with emergency numbers saved. If you’re hiking in remote areas without phone signal, consider a personal locator beacon (PLB) or satellite messenger.
This gear significantly increases your chances of being found quickly and helps you find safe routes.
Shelter and Weather Protection
Weather can change fast outdoors, so bring lightweight, portable shelter. A compact emergency bivvy sack or space blanket is crucial to keep you warm if you have to spend an unexpected night out.
Pack extra layers, including a waterproof jacket and hat, to protect you from cold, rain, and wind. Choose clothes made of synthetic or wool fabric that dry quickly. Avoid cotton, which holds moisture and makes you cold.
Proper shelter prevents hypothermia and makes waiting for rescue safer and more comfortable. Having this gear in your pack is vital for any unplanned night out.
Essential First Aid Skills
You need to be ready to handle common injuries like cuts, sprains, and heavy bleeding on the trail. Knowing how to act quickly and correctly can prevent complications and keep you and others safe.
Treating Cuts and Wounds
First, clean the wound with clean water to remove dirt. Don’t use harsh chemicals like hydrogen peroxide, as they can damage tissue. Gently pat the area dry with a clean cloth or sterile gauze.
Apply an antibiotic ointment to reduce infection risk. Cover the wound with a sterile dressing or bandage to protect it. Change the dressing daily or if it gets wet or dirty.
Watch for signs of infection like redness, swelling, or pus. If the wound is deep, won’t stop bleeding, or shows signs of infection, get professional medical help.
Managing Sprains and Fractures
If you suspect a sprain or fracture, don’t move the injured limb to prevent further damage. Use the RICE method: Rest, Ice, Compression, and Elevation.
Rest the injured part right away. Apply ice wrapped in a cloth for 15-20 minutes every few hours to reduce swelling. Use an elastic bandage for gentle compression, but not so tight that it cuts off circulation.
Elevate the limb above heart level if you can. For suspected fractures, try to keep the limb still using splints made from sticks or any firm material, and secure it with strips of cloth or bandages.
Handling Heavy Bleeding
Control severe bleeding by applying firm, direct pressure to the wound with a clean cloth or your hand. If the cloth gets soaked, add more layers without removing the original one.
Elevate the bleeding area above the heart if possible. If pressure and elevation don’t stop the bleeding, use a tourniquet only as a last resort and place it above the injury.
Keep the person lying down and calm to help reduce blood flow. Call for emergency help immediately when dealing with heavy bleeding.
Responding to Medical Emergencies
When you face a medical emergency on the trail, your actions can make a big difference. Stay calm, assess the situation carefully, and treat the most serious problems first. Knowing key steps for specific conditions helps you act quickly.
Dealing with Shock
Shock happens when the body isn’t getting enough blood flow. Look for pale, cold, clammy skin, rapid breathing, and weakness.
To help:
- Lie the person down and raise their legs about 30 cm if there’s no injury to the head, neck, or legs.
- Keep them warm with extra clothing or a blanket, but don’t let them overheat.
- Don’t give food or drink if they are unconscious or nauseous.
- Monitor their breathing and pulse until help arrives.
Quick action improves their chances of recovery.
Managing Allergic Reactions
Allergic reactions can range from mild itching to severe difficulty breathing. Look for swelling, hives, or trouble breathing.
If the person has an adrenaline (epinephrine) auto-injector, help them use it right away.
Steps to follow:
- Call emergency services or get help quickly if symptoms get worse.
- Keep the person calm and seated or lying comfortably.
- Remove any triggers if you can, like stings or foods.
- Watch for signs of anaphylaxis—swelling of the face, difficulty breathing, or losing consciousness.
Having adrenaline handy can save a life on the trail.
Addressing Hypothermia and Hyperthermia
Hypothermia means the body is losing heat too fast. You’ll see shivering, confusion, slurred speech, and weakness.
For hypothermia:
- Move the person to shelter immediately.
- Remove wet clothes and replace them with dry layers.
- Use blankets or body heat to warm them gradually.
- Avoid hot drinks or direct heat, which can cause shock.
Hyperthermia happens when the body overheats, causing dizziness, headache, and a rapid pulse.
Treat hyperthermia by:
- Moving to shade or a cool place.
- Drinking small amounts of water regularly.
- Applying cool, wet cloths to the skin.
- Resting until symptoms improve.
Quickly controlling temperature issues prevents serious complications.
Recognizing and Caring for Dehydration
Dehydration happens when you lose more fluids than you take in. Signs include thirst, dry mouth, dizziness, and dark urine.
If you suspect dehydration:
- Encourage drinking small sips of water frequently.
- Avoid sugary or caffeinated drinks, which can make dehydration worse.
- Rest in a cool, shaded area.
- Monitor for worsening symptoms like a rapid heartbeat or confusion.
Severe dehydration needs urgent medical help. Staying hydrated is key for your safety on the trail.
Getting Help: Signalling and Communication
Knowing how to signal for help is crucial if you get lost or injured. Using sound or light signals, along with modern devices, increases your chances of being found quickly.
Whistles and Mirrors
A whistle is a simple, lightweight tool that makes loud, sharp sounds to attract attention. Its sound travels far, even through thick trees, making it great for alerting rescuers. Remember the three short blasts repeated every minute.
A signal mirror reflects sunlight to create bright flashes visible for miles. It works best on clear days. To use it, aim the mirror so the sun’s reflection shines on your target while waving the mirror slowly.
Both tools are durable and don’t need batteries, making them reliable in emergencies.
Emergency Beacons (EPIRBs)
EPIRBs send a distress signal with your exact GPS location to rescue teams via satellite. When activated, your signal reaches emergency services almost immediately, helping reduce search times. They’re highly reliable, even in remote areas without mobile phone coverage.
These beacons are compact but usually cost more. EPIRBs need to be registered, ensuring your details are available to rescuers. They also have limited battery life, so check them before your trip. If you hike in very remote areas, an EPIRB is an essential safety tool.
Phones and Satellite Devices
Mobile phones are useful for emergency calls if you have signal. Check the coverage map before your hike. Keep your phone in a waterproof case. Don’t rely only on your phone, as signal loss is common in forests or mountains.
Satellite phones and satellite messengers work via satellites, providing global coverage. They can send texts or SOS alerts with GPS coordinates. Satellite devices often have extra features like weather updates.
Carrying a satellite device along with your phone improves your communication options. These usually require a subscription but are invaluable where there’s no mobile coverage.
Navigating Challenges: Terrain and Environment
When hiking, you must be ready for tough terrain and sudden environmental challenges. Knowing how to deal with wildlife and bad weather is crucial for your safety.
Wildlife Encounters
Stay alert for signs of animals like tracks or droppings. Keep a safe distance if you spot wildlife; never approach or feed them. Make noise while walking to avoid surprising them.
If you encounter a large animal like a bear, stay calm and slowly back away without turning your back. If the animal charges, use bear spray or try to look bigger by raising your arms.
For smaller animals like snakes or insects, watch where you step and avoid touching plants or ground cover without checking first. Carry a first aid kit with treatments for bites or stings.
Bad Weather
Check the weather forecast before heading out and be ready for sudden changes. Carry waterproof clothing and extra layers to stay warm and dry.
If a storm approaches, find shelter away from tall trees, exposed ridges, and water. Avoid metal objects during lightning.
In heavy rain or snow, slow your pace to avoid slips. Always keep an eye on the trail to avoid dangerous areas like flooded paths or unstable ground.
Preventing Hiking Emergencies
To lower your chances of emergencies, you need to prepare carefully, share your plan, and stay fit. Each step plays a vital role in keeping you safe on the trail.
Planning Your Trip
Before you hike, study your route thoroughly. Look at distances, elevation changes, and possible hazards. Plan your trip with estimated start and end times. Tell someone responsible about your plans, including the route, expected return time, and emergency contacts.
Check the weather forecast and trail conditions on the day of your hike. Be ready to change plans if bad weather or trail closures happen. Carry a map, compass, and GPS device to avoid getting lost. This preparation helps emergency responders find you quickly if needed.
Packing the right gear is essential. Bring a full first-aid kit, enough water, food, and clothing layers suited to the conditions. These steps reduce your risk of running into trouble.
Group Safety
If you’re hiking with others, having a leader can improve safety. The leader keeps the group on track, checks on everyone’s condition, and makes decisions during emergencies. Keep the group size manageable so you can move efficiently and stay connected.
Set clear rules before you start, like staying within sight of each other and having regular check-in points. Encourage open communication; everyone should feel comfortable saying if they feel unwell or tired. This prevents small problems from becoming serious emergencies.
Carry useful items like whistles or emergency blankets to help if someone gets lost or injured. Knowing basic first aid as a group means you can respond quickly to common hiking injuries.
Your Health and Fitness
Your fitness level affects how you handle the physical challenges of hiking. Prepare by doing regular cardio and strength exercises before your trip. This reduces your risk of exhaustion or injury on the trail.
Be honest about your limits. Choose hikes that match your experience and physical condition. Don’t push yourself beyond what you can handle safely, especially in tough weather or rough terrain.
Keep any necessary medications with you and manage any ongoing health conditions carefully. Stay hydrated, fueled, and take regular breaks to keep your energy and focus up. Taking care of your health before and during the hike helps prevent many emergencies.
After an Emergency
After an emergency, first, make sure everyone is safe and accounted for. Take care of any remaining medical needs and move to a secure location if you can.
Next, you should have a debriefing with everyone involved. This helps you review what happened and figure out what went well and what could be better next time. Create a comfortable space for open and honest communication.
During the debriefing, discuss these points:
- What was the emergency?
- How did you react?
- What worked effectively?
- What challenges did you face?
- What could you do differently next time?
Keep clear notes of what came out of the debriefing. This includes any lessons learned and action steps for better preparation in the future.
Common Questions
Knowing exactly what to carry for first aid when hiking can make a big difference. You need to think about the size of your kit, local conditions, and specific health risks. Choosing the right items helps you stay prepared without carrying too much weight.
What should be in a first aid kit for a day hike?
Your day hike first aid kit should have plasters, antiseptic wipes, adhesive tape, sterile gauze pads, pain relief tablets, and blister treatment. Add scissors, tweezers, and a small emergency blanket for extra safety. Keep basic wound care instructions inside the kit.
How do UK hiking first aid kits differ from other regions?
In the UK, you should consider local weather and common trail risks like ticks, so include tick removal tools and antihistamines. UK kits often have stronger waterproof coverings because of frequent rain. Other regions might need snake bite kits or altitude sickness remedies.
What are the essential items for an ultralight backpacking first aid kit?
For ultralight backpacking, focus on items that do more than one job, like a compact roll of tape, small antiseptic wipes, and minimal blister care supplies. Choose lightweight, durable packaging, and leave out heavier items unless you’re going to very remote areas where help is far away.
Which first aid kits are best for hiking?
Look for kits that offer a good balance of size, weight, and content quality. Popular choices include kits with waterproof cases, reflective markers, and refillable compartments. Check that the brand has good reviews and clear instructions for quick use.
How can I ensure my hiking first aid kit meets UK safety standards?
Make sure your kit follows Health and Safety Executive (HSE) guidelines by including recommended items like plasters, dressings, and gloves. Buy kits labeled as compliant or check their contents against official checklists. Remember to regularly update and replace expired items.
Where can I find a reliable first aid kit checklist for camping and hiking?
You can find trustworthy hiking first aid kit checklists on specialist outdoors websites and government health pages. Some sites also offer printable versions tailored to UK conditions, making it easy to pack everything you need before your trip.
Final Thoughts – Stay Safe, Explore More
Being ready for anything when you hit the trails isn’t about being scared; it’s about being smart.
By taking the time to learn basic first aid, pack the right gear, and understand how to handle unexpected situations, you’re not just preparing for emergencies – you’re giving yourself the freedom to explore with confidence.
Every step you take on a hike should be filled with enjoyment, knowing you’re equipped to face whatever the wilderness might bring. So, get prepared, get out there, and enjoy the incredible beauty of nature, safely.
Recent Posts
What is fun about hiking? Take the first step to loving a new hobby
You’ve probably heard your friends talking about their amazing hiking experiences, and you might be wondering why it’s such a big deal. We all understand the appeal of getting away from our...
Be Prepared: The Ultimate Guide to First Aid Kits for Hiking
Hiking is a great way to explore the outdoors and stay active, but it also comes with some risks. When you're out on the trail, you may encounter obstacles and accidents that require immediate...