

Table of Contents
Some links on posts are affiliate links and will earn us a commission from qualifying purchases
Hiking is an awesome way to explore the great outdoors, challenge yourself both physically and mentally, and connect with nature. But remember to stay properly hydrated during your hike. Our bodies are about 60% water, so it’s crucial to keep them well-hydrated for proper functioning.
When hiking, especially in warm or dry climates, the body loses water through sweat and breathing faster than normal. It is essential to replace this lost water by bringing enough for the entire hike. So let’s take a look at water storage and see how you can be prepared for your next hike.
Importance of Water During Hiking
Staying properly hydrated during a hike is important to avoid dehydration. Dehydration can cause symptoms like headaches, dizziness, nausea, and fatigue, which can make your hike unsafe and increase the risk of accidents. In severe cases, rapid dehydration from sweating too much can even lead to heat stroke or worse. So, make sure to prioritize staying hydrated when going on outdoor adventures.
Water also helps with regulating body temperature – sweating cools down your skin as the sweat evaporates from its surface. Without adequate hydration (water), your sweat cannot effectively cool down your body temperature leading to overheating.
Basic Knowledge on How Much Water To Bring
The amount of water needed for a hike depends on factors such as distance traveled (miles), trail difficulty level (how much elevation gain/loss), weather conditions (temperature/humidity), individual fitness level/body weight and age.
A general rule of thumb is to consume about half a litre (17 ounces) of water per hour while hiking under moderate intensity conditions.
However this varies significantly between individuals; some hikers may require more or less depending on their physical characteristics mentioned above. It’s best practice to bring extra hydration just in case – aim for 1 litre per hour if possible, especially if you are hiking under hot/dry conditions where sweating will increase greatly.. Additionally keep in mind that other factors such as altitude, high winds, and sun exposure can increase water loss.
What’s the best way to carry water on a hike?
The best way to carry water on a hike depends on several factors – how far you’re going, how much water you’ll need, the availability of refill points, and your personal comfort.
For Short Hikes (Under 2–3 Hours)
For short day hikes, a simple water bottle (like a Nalgene or CamelBak Chute) is usually more than enough. You can easily carry one in your backpack’s side pocket or even by hand if the terrain is gentle. A typical adult might need around 500ml to 1 litre for a hike of this length in moderate weather.
Where do you put your water bottle when hiking?
Most hiking backpacks come with side mesh pockets that are designed specifically for holding water bottles. These pockets are typically located on both sides of the pack, making it easy to store one or two bottles within quick reach. They’re made from stretchy, durable material to accommodate different bottle sizes and shapes.
For Longer Day Hikes (Over 3 Hours)
If you’re planning to be out longer or hiking in warm weather, a hydration bladder (like the Osprey Hydraulics or CamelBak Crux) is often the best way to carry water when hiking. These fit inside your backpack and have a drinking tube, allowing you to sip on the go without stopping. This helps you stay consistently hydrated without breaking your rhythm.
Many experienced hikers also bring a backup bottle—often a lightweight, collapsible bottle like the Hydrapak Stash—which can be used to refill the bladder or hold electrolyte drinks.
For Multi-Day or Remote Hikes
If you’re hiking in areas without reliable water sources, carrying larger capacity options is key. A mix of a hydration bladder and 1–2 extra bottles gives you flexibility. Some hikers also carry a water filtration system (like a Sawyer Mini or Katadyn BeFree) so they can safely refill from streams or lakes.
There’s no one-size-fits-all answer, but many hikers use a hybrid approach:
- Hydration bladder for convenience and regular sipping
- Bottle for backup, mixing drinks, or refilling
- Collapsible bottle for saving space once empty
Pre-hike preparation
Researching the trail and its water sources
Before embarking on a hike, it is important to research the trail and know where the water sources are located. This information can be found in guidebooks, online forums, or by talking to local hikers.
Knowing where to find water sources along the trail can help you plan how much water you need to bring and how much you can refill along the way.
It is also important to keep in mind that some water sources may be seasonal or dry up during certain times of the year.
Bringing enough water for the entire hike
Bringing enough water for your entire hike is crucial for proper hydration and avoiding dehydration. The amount of water needed depends on various factors such as temperature, altitude, physical exertion level, and individual body needs.
General rule of thumb is 1 litre (or 32 ounces) per hour of hiking. It is recommended to carry at least 2 litres of water per person per day on a moderate hike in temperate conditions.
Choosing the right type of container for water storage
When choosing containers for storing drinking-water while hiking, it’s important that they are lightweight, durable and easy to carry around. Avoid glass containers which can easily break when dropped or heavy metal cans which add extra weight.
Plastic bottles made from BPA-free materials are a good option but also consider collapsible bottles or refillable hydration bladders that fit within backpacks with built-in hydration systems as they provide hands-free convenience while hiking.
When you are next purchasing hiking goods, consider whether you need some emergency water storage containers – you can never be over prepared.
Proper pre-hike preparation ensures that hikers have enough drinking-water throughout their journey, knowing where refills can be found along routes lessens unnecessary weight carried during hikes while selecting appropriate container materials increases convenience resulting in an overall enjoyable experience.
Water Treatment Methods
When going on a hike, it is important to have access to safe drinking water. However, not all water sources are clean and free from harmful bacteria. Thus, hikers need to know different water treatment methods that can purify the water and make it safe for drinking.
Boiling
Boiling is one of the simplest and most effective methods of treating water in the country. It works by killing any micro-organisms that might be present in the water. To boil water, simply heat it until bubbles start to form and continue boiling it for at least one minute (or three minutes if you’re above 6,562 feet or 2,000 meters).
Boiling does not remove sediment or chemical pollutants from the water.

SOTO Amicus Camping Stove
The SOTO Amicus with Stealth Igniter is a high-performance, low-cost canister stove suitable for camping and backpacking.
- The stealth igniter is installed inside the burner post, improving ignition and preventing breakage. The stove is compact and lightweight, weighing 2.9 oz (81g).
- It performs well under windy conditions, thanks to a unique raised ledge at the crown of the burner head and a concave burner surface.
- Compatible with standard isobutane canisters from brands like Primus, Snow Peak, MSR, and Jetboil.
- The stove has an output of 2800 kcal/h (3260W) and 11000 BTU. It can burn for approximately 1.5 hours with an 8 oz (250g) canister.
Read our Beginners Guide to Choosing the Right Stove
Filtering
Using a portable filter is another popular method for treating backcountry water sources. Filters come in various shapes and sizes and can be used to remove sediments as well as bacteria and viruses from untreated water.
Chemical Treatments
Chemical treatments involve using a variety of chemicals such as iodine or chlorine dioxide tablets to disinfect the contaminated water.
Boiling and filtering are both effective ways of purifying water, while chemical treatments can also be an option. Understanding the advantages and disadvantages of each method is crucial in choosing which method to use.
Read this article for tips on purifying water.
Tips for Conserving Water
When hiking, it’s important to conserve as much water as possible in order to avoid running out of it before reaching your destination. Here are some tips to help you conserve water:
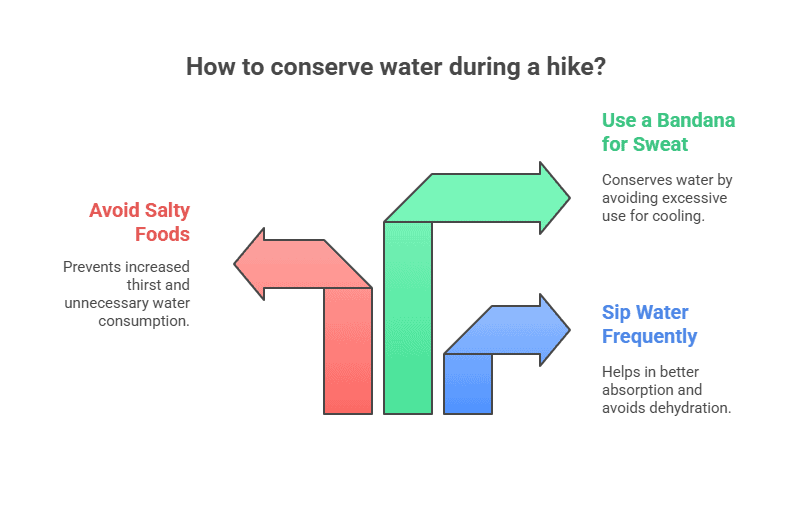
Drinking Small Sips Frequently Instead of Gulping Large Amounts at Once
Drinking small sips frequently throughout the hike is more effective than gulping large amounts at once. This allows your body to better absorb the water and avoid dehydration.
Drinking too much water too quickly can also lead to a bloated feeling and discomfort.
Avoiding Salty Foods that Can Dehydrate the Body
Salty foods can cause dehydration as they make you thirstier and cause you to drink more water than necessary. Avoiding salty snacks like chips, pretzels, or jerky can help maintain your hydration levels throughout the hike.
Using a Bandana or Cloth to Wipe off Sweat Instead of Using Extra Water
Sweating is a natural process that helps cool down our bodies during physical activity. However, wiping off sweat with a bandana or cloth instead of using extra water can conserve your valuable resources.
It’s important to keep your body temperature regulated but if you’re constantly pouring cold water on yourself, it can deplete your supply fast.
By following these tips, you’ll be able to conserve more water on your hikes and stay hydrated throughout the journey.
Types of Water Storage Options
When preparing for a hike, choosing the best way to carry water when hiking depends on the length and difficulty of your route, the availability of refill stations, and your personal preferences. Below are the main hydration storage options for hikers, each with its pros and cons.
1. Water Bottles
Traditional water bottles are a reliable and familiar option. They’re easy to refill, clean, and carry. If you’re wondering how much water to take hiking, a general rule is about half a litre per hour of moderate activity – so for a 4-hour hike, aim for at least 2 litres. You can carry this using one or two bottles depending on your pack layout.
2. Collapsible Bottles
Lightweight and compact, collapsible bottles are ideal for saving space as you drink. This makes them one of the best ways to carry water when hiking on longer treks or in remote areas where you might top up from natural sources. Collapsible bottles are excellent for hiking, especially on longer or space-conscious trips. They’re lightweight, packable, and great as backup bottles. However, they may be less durable than hard bottles if handled roughly.
3. Hydration Bladders
For hands-free access to water, hydration bladders are excellent. They fit inside your backpack and come with a drinking tube. Many experienced hikers consider this the ultimate solution for efficient drinking on the move. As part of your hydration storage tips for hikers, remember to regularly clean the bladder and tube to avoid bacteria build-up.
4. Hard Plastic or Stainless Steel Bottles
While these are heavier, they offer durability and insulation, keeping your water cool in summer. They’re a good backup option and can also serve other purposes like boiling water in survival situations.
Each of these options can be effective, but the best way to carry water when hiking may vary depending on conditions and distance. A smart strategy is to mix and match—for example, use a hydration bladder for immediate access and a collapsible bottle as a backup or to refill from streams.
Comparison Table: Best Ways to Carry Water When Hiking
| Product | Type | Capacity | Key Features | Ideal For |
|---|---|---|---|---|
| Nalgene Wide Mouth 1L | Hard Bottle | 1L | Virtually indestructible, wide mouth, BPA-free | Day hikes, cold weather use |
| CamelBak Chute Mag 750ml | Hard Bottle | 750ml | Leak-proof magnetic cap, ergonomic design | Short hikes, everyday use |
| Hydrapak Flush 1L | Collapsible Bottle | 1L | Packs down small, ultra-light | Backpacking, long-distance hiking |
| Platypus SoftBottle 1L | Collapsible Bottle | 1L | Extremely flexible, durable, BPA-free | Multi-day hikes, space-saving |
| Osprey Hydraulics 2L Reservoir | Hydration Bladder | 2L | Rigid backplate, bite valve, leak-proof | Hands-free hydration on the trail |
| CamelBak Crux 2L Reservoir | Hydration Bladder | 2L | Wide opening, fast flow, insulated tube (optional) | Long hikes, technical trails |
| Hydro Flask 21 oz | Insulated Bottle | ~621ml | Double-wall vacuum insulation, keeps water cold up to 24 hrs | Hot climates, cold water lovers |
| Klean Kanteen Classic 800ml | Stainless Steel Bottle | 800ml | Durable, eco-friendly, non-toxic | General hiking, everyday carry |
Is a water bottle or bladder better for hiking?
Both have pros and cons – water bladder vs bottle is a frequently asked question amongst hikers. Hydration bladders offer hands-free drinking, ideal for long hikes and steady sipping. Water bottles are easier to clean and better for short hikes or casual use. Many hikers carry both – a bladder for access and a bottle for refills or electrolyte drinks.
For the best way to carry water when hiking, choose a solution that balances convenience, weight, and hydration needs. If you’re unsure how much water to take hiking, always overestimate a little – running out on the trail can be dangerous.
Importance of Proper Hydration on the Trail
Proper hydration is essential when it comes to hiking. Your body needs water to function properly, and even minor dehydration can cause fatigue, headaches, and muscle cramps. When you’re hiking, it’s important to drink water regularly to keep your body hydrated and functioning at its best. Read on for our hydration tips for hikers.
Recognizing Signs of Dehydration and Heat Exhaustion
Dehydration occurs when your body loses more fluid than you take in. Symptoms of dehydration include thirst, dry mouth, fatigue, headache, dizziness or lightheadedness. If left untreated it can lead to heat exhaustion which is a serious condition that requires immediate attention.
Symptoms include heavy sweating; weakness; cold, pale skin; fast pulse; fainting or vomiting.
It’s important to be aware of these symptoms while hiking so that you can recognize them early on and take steps to prevent further dehydration or heat exhaustion.
Read our comprehensive guide on avoiding dehdration here.
Knowing When to Rest and Rehydrate
If you start experiencing symptoms of dehydration or heat exhaustion while hiking, it’s important to stop immediately and rest in a cool shaded area where possible. Drink fluids slowly during the rest period before continuing on your hike.
It’s also a good idea to take regular breaks during your hike – especially in hot weather – where you can sit down in the shade and rehydrate with plenty of water before continuing along the trail.
Proper hydration is crucial for hikers as it helps maintain optimal physical performance while preventing dangerous conditions like heat exhaustion.
By learning how to recognize signs of dehydration and taking steps like resting frequently on challenging terrain and drinking enough fluids throughout your hike will keep you healthy and safe!
Conclusion – effective water storage tips for hiking
Having access to water during a hiking trip is crucial for sustaining the human body. Inadequate hydration can lead to heat exhaustion, dehydration, and even death, especially when hiking in hot and dry conditions.
Bringing enough water on a hiking trip is essential, but it’s equally important to store and treat the water properly. By researching the trail beforehand and knowing where to find reliable water sources along the way helps in planning how much water you will need.
Choosing the appropriate container for your water storage needs is also important based on your preference – whether you choose plastic or metal containers or hydration bladders. Water treatment methods like boiling or filtering are necessary when accessing natural sources of water that may contain bacteria or viruses.
Conserving what little amount of water available through small sips frequently instead of gulping large amounts at once allows you to last longer before refilling. Sweat evaporation causes dehydration so using a bandana or cloth instead can help reduce heat loss from your body ensuring you only have enough sweat leftover when rehydrating.
Carrying extra collapsible bottles or containers is also helpful so that you can store additional drinking water once close to a potential source. However, it’s crucial not to overdo carrying extra weight as this may affect your journey’s outcome due to fatigue.
Knowing when to rest and rehydrate is an integral part of managing proper hydration during hiking trips. Understanding signs of dehydration like thirstiness, dry mouth feeling weak or dizzy indicates your body needs more fluids; taking regular breaks reduces chances of these symptoms occurring hence keeping hydrated throughout.
Following these effective tips for storing and treating drinking water while hiking will ensure that hikers stay hydrated throughout their trip on any terrain they may encounter. Proper hydration ensures that hikers remain safe while enjoying their outdoor adventure.
Recent Posts
Ultimate Guide to Recognizing the Signs and Avoiding Dehydration
We all know that staying hydrated is important, but do you understand why? Our bodies are made up of about 60% water, which means that water plays a crucial role in keeping our bodies healthy and...
I always advocate having water to hand when walking, and whilst I probably don't drink enough water day to day, if I am going on a long walk I will always have at least one bottle with me. I also...